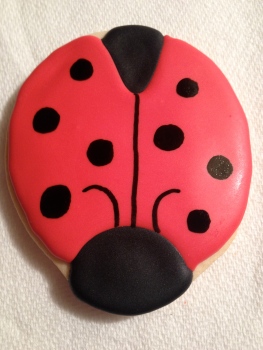
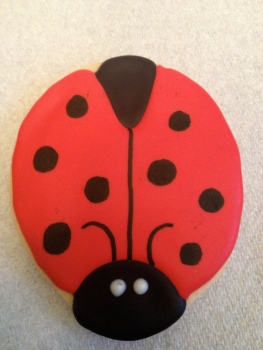
In addition to Ladybug Pretzels, cookies were also made for Ms. Olivia’s hitting the big 1. I whipped up about 3 dozen of these guys, using the cookie dough and royal icing recipes in this post. One batch of cookie dough and royal icing will make about 1 dozen cookies, so I had to triple the recipe.
To make this exact cookie you will need:
Ladybug cookies (I used my cookie recipe from this post and an Ann Clark cookie cutter available on Amazon) but you could use an oval just as easily
Royal icing You will need a very small amount of white for eyes, and the rest tinted red and black *NOTE: you will need a LOT of dye to make your royal icing red or black. Do NOT try to skimp, or you will wind up with shades of pink or gray. This is one of those times where, if you really want a vibrant color, you will have to be generous*
3 piping bags
Piping tips 2, 3 & 5
1. Bake your cookies and let cool.
2. Fit a piping bag with your #4 piping nozzle and fill bag partway with red royal icing. Pipe an outline for the red body and fill in with your icing (use photos for a guide). Set aside for icing to harden, several hours (you risk smearing your red icing if you don’t wait for this to dry).
3. Once icing has set, fit a second piping bag with a #3 tip and black icing. Pipe a circle shape for the head and a “V” for the body. Let dry overnight.
4. Using your food marker, add details, like antennae and spots. In the photo your can see I got a bit tired of this and started adding some hearts instead of spots 🙂 You can use a little royal icing in white for eyes with a #2 piping tip. What I did though (because I forgot to set some white aside) was use a candy pen.
These were so much fun to make. It was a really cute theme for a first birthday party. They looked great all piled on a black platter!
Happy baking!!
~Victoria

