I can’t begin to talk about how much I love these blossoms. I’ve used these as a filler flower in a wedding cake floral spray, but I think they are stunning in their simplicity on their own. After rediscovering this cutter and veiner set during my spring reorganization, I decided to make a whole bunch to restock my supply.
Gum paste flowers can be kept indefinitely, if stored properly, as they are not made with any materials that will spoil. However, if exposed to light for a period of time, the color can fade. I use a plastic bead organizer for storing mine.
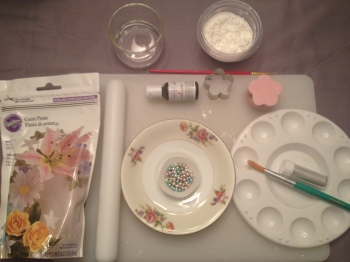
To make this specific blossom, you will need:
Gum paste–also known as flower paste–or you can use fondant strengthened with gum powder
Rolling pin
Powdered sugar (PS) or cornstarch (CS) (I just use whatever is handy at the moment)
Plastic painter’s palette (it’s a good idea to dust this too with PS or CS to prevent your flowers from sticking while drying)
Flower centers (Piping bag with frosting or pearl sprinkles)
Small amount of water & fine-tip paintbrush (if you are using sprinkles for your centers)
Silver luster dust and fat paintbrush (optional–use if you want shimmer to your blossoms)
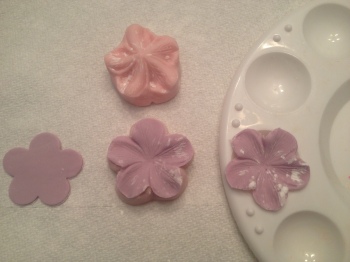
1. Lightly dust your surface with cornstarch or powdered sugar, then grab a small amount of gum paste and knead it until it is soft and pliable. Add coloring if desired. The gum paste should not stick to your fingers. If it does, add a little powdered sugar or cornstarch. If it is too hard, rub in a bit of vegetable shortening. Use a rolling pin and roll the paste out thinly, nearly paper thin. Cut out blossom.
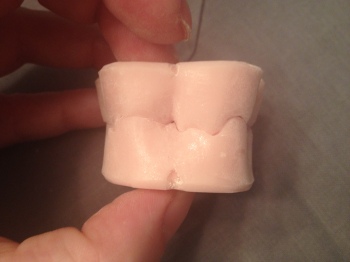
2. Dust veiner with CS or PS, then take cut-out blossom and line up the petals in the bottom part of the veiner (concave). Use the top part of the veiner (convex) and line up with the markings on your veiner (mine has an indentation on the top and bottom, to illustrate where they should line up properly). You can see here that there are slight indentations at the top and bottom of the veiner–you have to look pretty close to see them though!
3. Press down gently to make your impression. Be careful not to push too hard–you can tear your gum paste this way. Gently remove flower–they can tear, so be careful. If it is difficult to remove, your veiner may not be dusted with enough CS or PS. Remember–when the flower is dry, you can dust off the cornstarch or powdered sugar very easily with a clean paintbrush. Place in palette to dry. Repeat to make as many blossoms as you like.
4. Once dried, I like to dust mine with a little pearl dust. I love adding that little dimension to my work. You can add highlights with other colors, too. Getting creative here is a lot of fun. 🙂
5. If using a pearl sprinkle, use your paintbrush to add a little water to the center. Add in pearl and set aside to set.
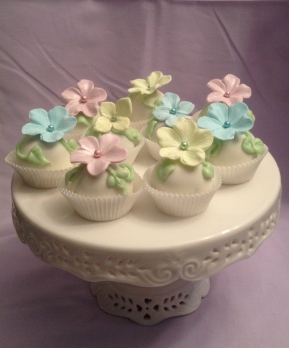
I really can’t get over how pretty these are. I put these on some cake balls I made and piped some leaves and vines around them (the two in the center though are hydrangeas–maybe I will do a tutorial on them at some point). If you’d like to make some gum paste leaves check out this tutorial. I think they’d look lovely at a garden party or bridal shower.
Or, just eat them. That’s what I did!
Happy flower-making!
~Victoria


Is there a difference between gum paste and fondant? Your flowers are so beautiful.I love the dusting of the pearl powder!
Yes, there is a difference between the two. Gum paste (also known as flower paste) is able to be rolled out thinner, it is stretchier, and it dries harder than fondant. This is important when making large flowers, like lilies. However, you can add gum powder to fondant. Gum powder goes by many names, like CMC, Gum Tex, Tylose powder… they all work the same 🙂 And a little goes a long way! But I like to buy mine pre made from Wilton, and it is widely available in the craft stores like Michaels, Joann, and Hobby Lobby!
Pingback: How to Make Gum Paste Leaves [by Victoria] | Two Girls Enter, One Cake Leaves
Wow! Your flowers are gorgeous! Thanks so much for sharing your knowledge with us! I can’t wait to try to make them!